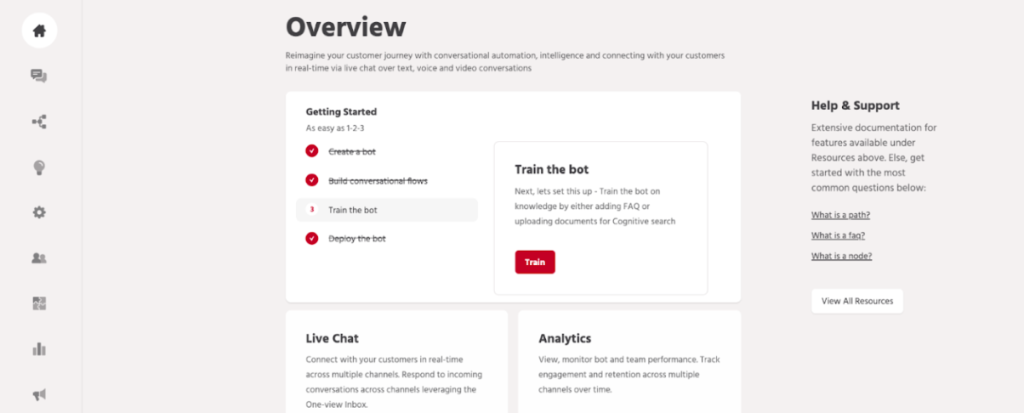
Elitbuzz Live Chat allows you to set up live chat for your bots. You can add multiple bots and set up different configurations for these bots.
Owner can click on ‘Configure Live Chat’ button from the Home page, to get started with Live Chat. As you switch to the live chat portal, you have to complete a few steps in Live Chat wizard. This workflow is available only to the Owner of the account.
These are the general configurations to be added for the bot.

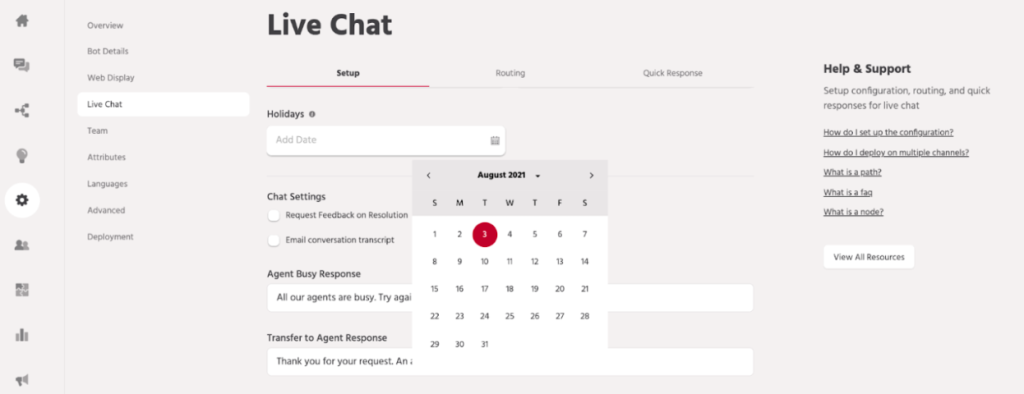
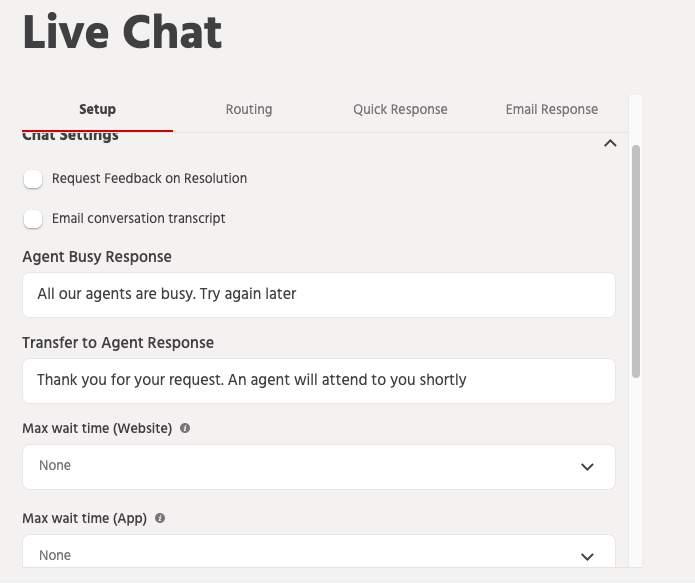
The details required are Request Feedback on Resolution, Agent Busy Response, Transfer to Agent Response, Exit Conversation Max. Wait time for mobile and web (channels available by default),Holiday dates.The owner or the supervisor can add or edit these at later point in time.
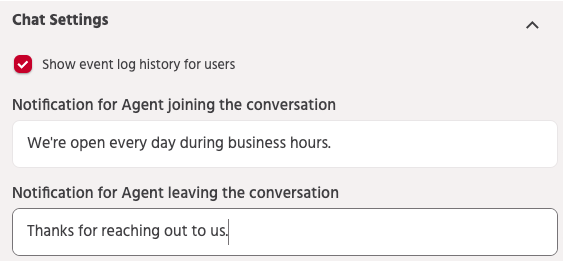
Custom notification text for agent joining/leaving conversation
To customize the notification message for when an Agent joins or leaves a conversation, you can enable the “Show event log history” button.

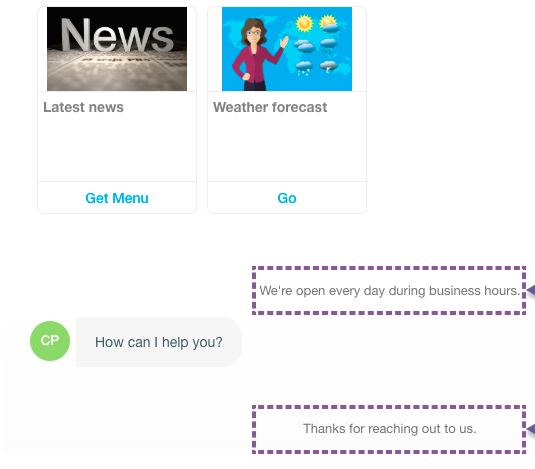
This is how it appears on the chat screen:
You can Setup Working hours and SLAs while onboarding. These can also be edited later, by going to Configure, Team and Setup by Supervisor or Owner.

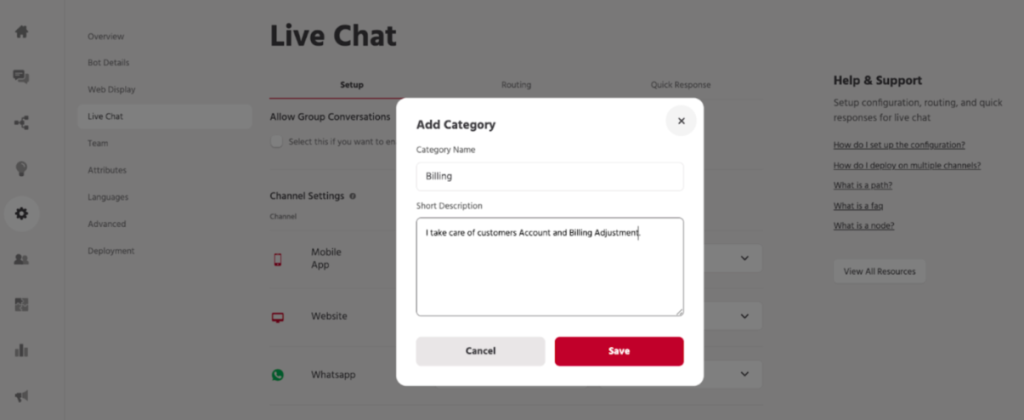
You can also add different categories for different agent groups for e.g. Support, Billing etc. The category “default” is available as a default for all Messages. The owner can add team members and assign channels and categories as required, and the same can also be changed as needed.
After adding all the details, the owner will be able to review all sections once. If required, the owner can edit the details added and then click on Save to complete the bot setup.
i) Request Feedback on Resolution: On enabling this option, the end user will be asked for feedback whenever the agent marks the chat resolved. ii) Agent Busy Response: This message will be the response shown to the user if live chat is triggered and the agents are busy. The text here can be modified by the supervisor. The message added here by default would be “All our agents are busy. Try again later” iii) Transfer to Agent Response: This message will be sent as a message by the bot when live chat is triggered.The message added here by default would be “An agent will attend to you shortly”iv) Wait Time: Supervisor can set the maximum wait time for the user in the queue. Max. wait time is applicable only for Web and Mobile SDK channels. After the expiration of the wait time, the user will be navigated to the agent unavailable flow. v) An email can always be sent upon resolution.

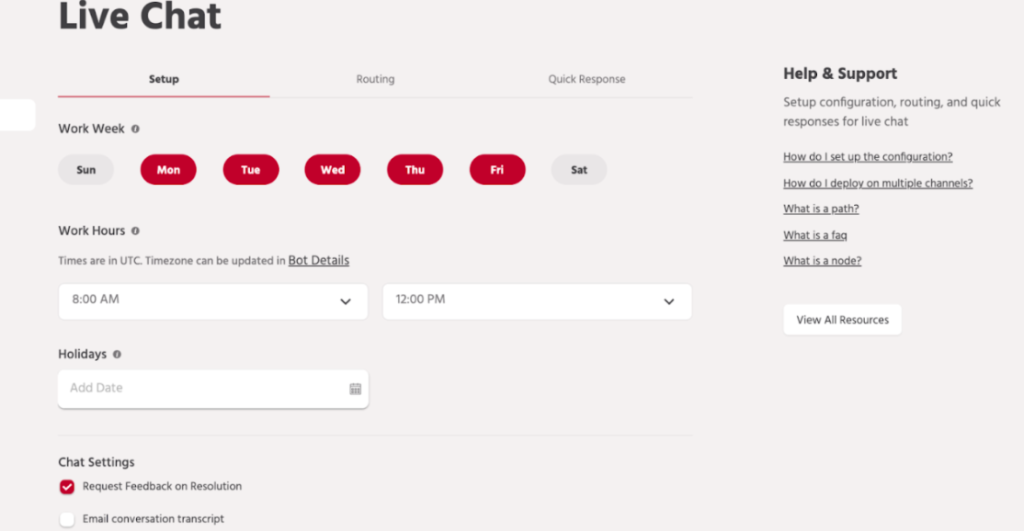
Work Week: The owner/supervisor can select the working days of the week. By default Mon- Fri will be set as the working days.
Work Hours: The owner/supervisor can set working hours of the day. The timezone for the working hours would be the same as the one set in General Settings.
Holidays: If there are other holidays except for the weekends, the owner/supervisor can add those dates here.
Max. conversations per agent: The owner/supervisor can set the maximum number of active conversations the agent can handle at a time. The number of conversations can be set differently for different channels.
SLA for Response: First response SLAs can be set according to the channels. The SLA violation counts will be visible on the dashboard.
SLA for Resolution: The supervisor can set SLA for resolution of queries coming in. The SLA violation counts will be visible on the dashboard.
The Owner/ Supervisor can see the list of agents and supervisors added for the product. The supervisor can add multiple agents and supervisors for the product.

To add an agent/supervisor/role, click on the “Add team member” button.
Choose a Role and fill the details like, name, Email, Channels etc.
When you Invite a member, An invitation email will be sent to the newly added user, who will need to accept to join the team.
If an existing supervisor is added for the product, the supervisor will be visible in the list for the product and will have shared access.
After adding an agent or a supervisor, you can change the assigned channels and categories.
