Email

Email

1. Introduction 

An Email support system is superior in many ways. It’s asynchronous and therefore is inherently more convenient. A person can send an email to a company and walk away, checking for a response when it’s convenient for them. A person is not committed to engaging in a real-time conversation that can get interrupted or lost due to connectivity issues or by simply clicking on a new Web page. Email also keeps a record. Emails can be stored and accessed later. On a phone call or Webchat interaction, no record exists.

Email is the most used digital customer service channel according to Forrester, but 62% of companies do not respond to customer support emails. This presents a real risk to customer loyalty and satisfaction. For the companies that do respond by email, they are not doing so quickly enough. 

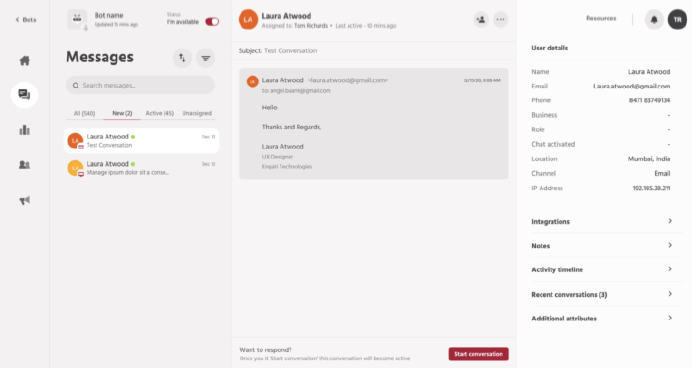
Customers want faster resolution of their email queries. Therefore,  having the flexibility of email as a channel within Elitbuzz’s omnichannel offering ensures that agents view and respond to email queries as efficiently as other channels. Agents do not need to monitor a separate email inbox for customer support queries.

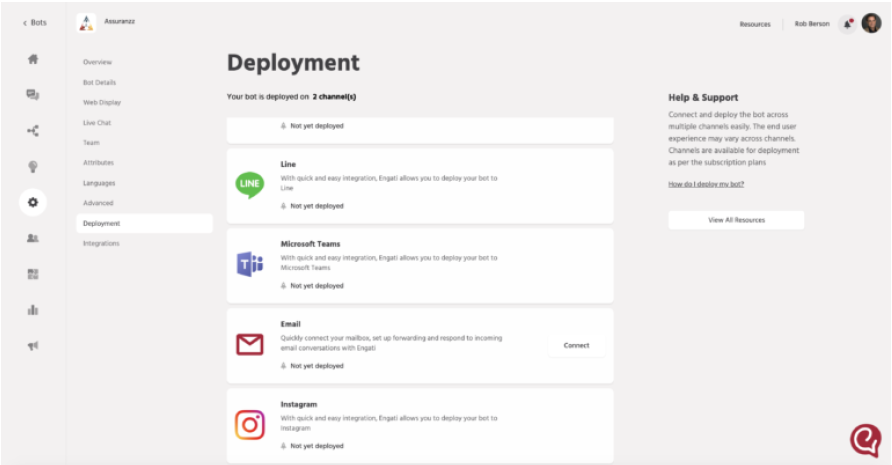
The email channel is available to accounts on the Business plan and above.

2. Conversation stitching

Conversation for email channel is uniquely identified by an email message ID. There may be multiple conversations per user for Email, unlike non-Email channels where there will be only one conversation per channel for that user.

3. Setting up email channel 

The email channel can be set up under Configure > Deployment. The customer needs to provide an email ID to listen to for incoming conversations. This is the support email address. Elitbuzz generates a forwarding address for this email ID which is unique. The customer has to set up the generated email address as the forward email address for the same.

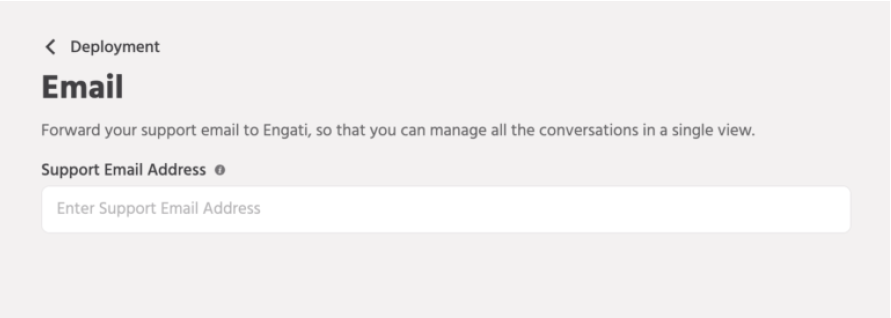
Once the customer provides a valid support email address and clicks on Next. He is taken to the section where the forwarding address is generated and available for copy.

The alias created is of the syntax – <10 char>@<customerdomain>.elitbuzzmail.com

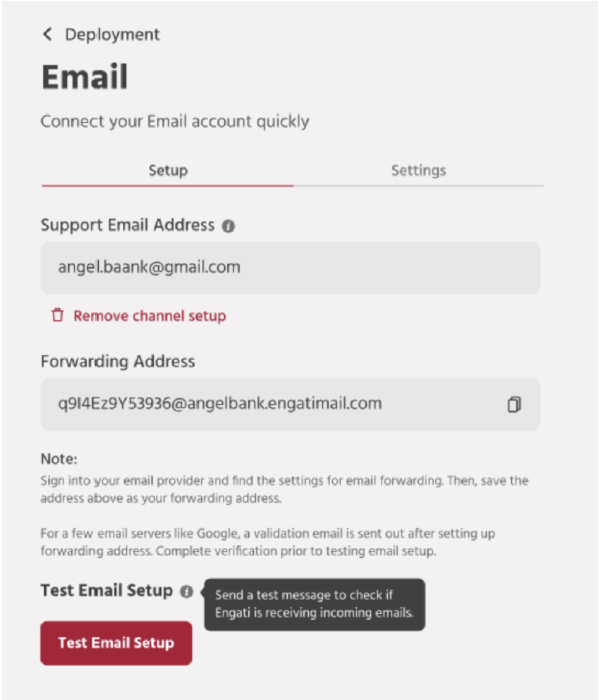
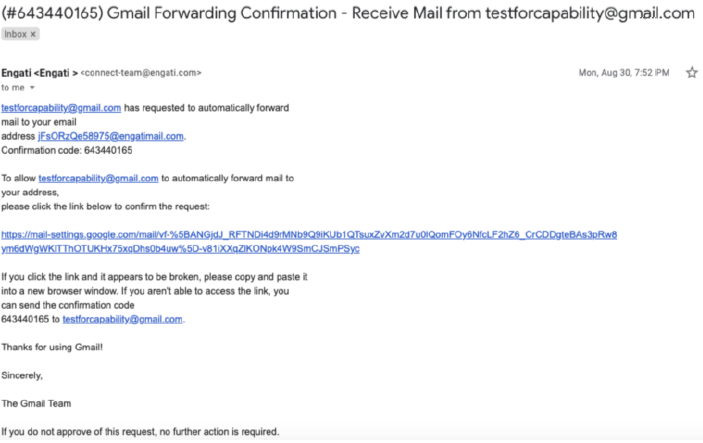
The customer needs to sign in to his email provider (for the support email address provided) and set up email forwarding with the forwarding address generated. After setting up our alias as a forwarding address, a validation email is typically received for Gmail, Yahoo but not for Office365 or Exchange (needs to be tested). The validation email received is detected and automatically forwarded to the support email address. The customer has to check their support email address for the verification email and complete the process. Once the verification is complete, the customer can continue to do a Test Email Setup.

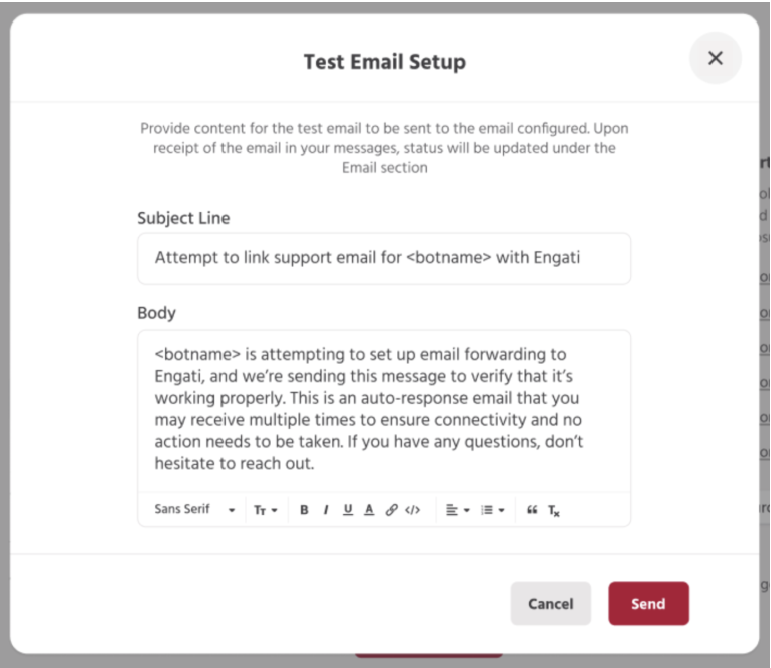
The user can test the setup by sending a test email to check if Elitbuzz is receiving incoming emails. This step is mandatory and the last step for completing the deployment

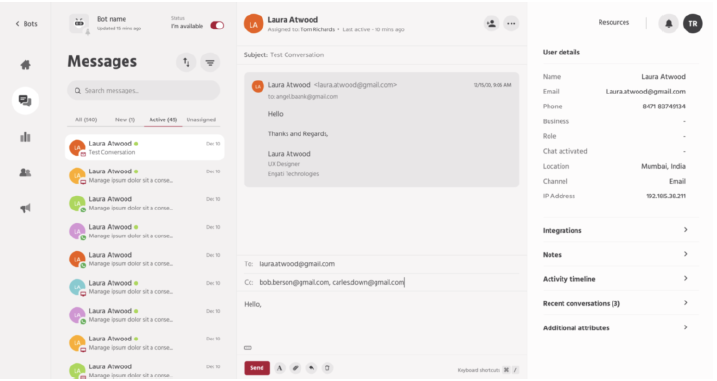
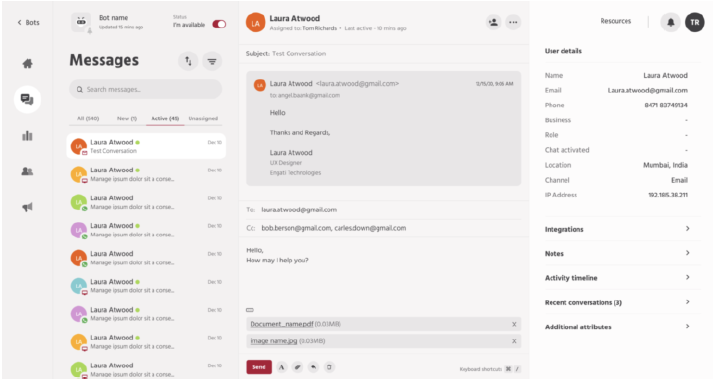
The user can set up the response settings of emails sent from the OneView Inbox. 

  • ‘Sender Name to Use ‘. It is the name of the Sender that will show up in the From field. By default, it’s the bot name.
  • ‘Allow Cc on Email Response’. If this checkbox is selected, then agents can add recipients in the cc section of the respond box. This will be made available as a cc hyperlink, which on clicking opens the cc section to add addresses. By default it is unchecked.
  • ‘Email address to Mark in Bcc’ – By default, we need to add the email support address which was provided. Agents cannot add new bcc recipients from the OneView Inbox.
  • ‘Email Signature’- It is the Email signature to be used on every email response. By default it is empty. In case an email signature is provided, it will be automatically available in the email body when the agent composes a fresh email from the respond box. This signature is editable.

4. Configuring forwarding address on Gmail

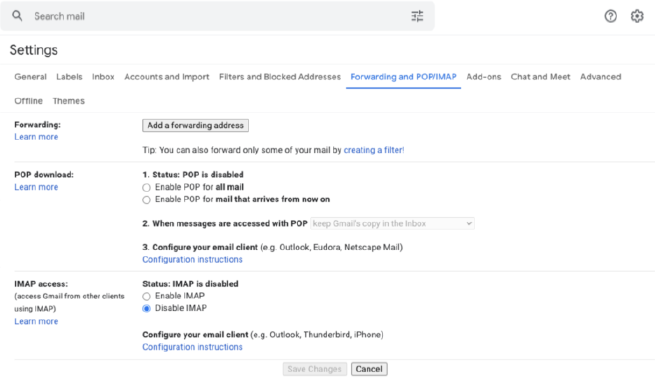
To set up forwarding address on Gmail

  • Goto the forwarding tab under settings and add the forwarding address generated in the email configuration of the Elitbuzz portal
  • On adding the forwarding address, you get a pop-up to confirm. Click on proceed
  • A confirmation email is received which requires a click action on a link.
  • The forwarding address section of the email provider will show that the address is set up
  • Test the email connection on the portal as the final step to the deployment 

5. Configuring forwarding address on Outlook 

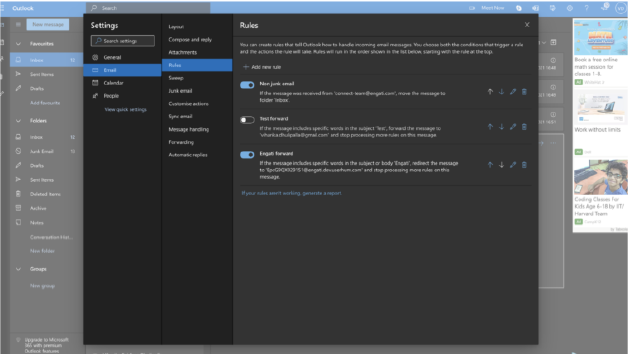
o set up forwarding address on Outlook

  • Log in to your Outlook account.
  • Click on the gear icon and then select View all outlook settings.
  • Select email -> Rules.
  • Create a new rule by adding an action with the Redirect to option. Add the generated alias as a redirect to email. Save the changes.
  • Make sure the newly created rule is checked in the Email -> rules section.

6. Receiving and composing an email in OneView Inbox 

  • When a user sends a new email to the support email address. This will be redirected to the forwarding address, from where it will be picked by Elitbuzz and made available to the preferred agent in his New request tab of one view inbox.
  • If there are no agents serving the category-email channel combination, the request will be redirected to the unassigned tab. The supervisor/owner can pick up the request and proactively assign it. If the unassigned request hasn’t been picked up, it will be auto-assigned once an agent starts catering to that category-email channel combination.
  • If the agents serving the category-email channel combination do not have available queues, the request will be redirected to the unassigned tab. The supervisor/owner can pick up the request and proactively assign it. If the unassigned request hasn’t been picked up, it will be auto-assigned once an agent catering to that category-email channel combination becomes available.
  • Email is an asynchronous channel and the online availability of the agent does not affect the email requests from coming into the inbox of the agent assigned through the routing logic 
  • Clicking “Start Conversation”  redirects the email  message to the Active tab and the agent can begin composing the email by typing in the Respond box

  • The agent can compose an email in the Respond box of the conversation in the Active tab.
  • Once the agent clicks on the respond box, it becomes active.The agent is given the options to utilize the font toolbar, insert canned responses, delete the composed mail, and add an attachment 
  • The To email address will be pre-populated with the user’s email address and cannot be edited. The email address will be the same as the previous email sent by the user. The same email address will be shown on the User Details panel as well.
  • If the owner/ supervisor has allowed agents to add cc emails in the response settings of configuration, then the agents will be able to add email addresses in the cc bar otherwise the cc bar isn’t provided 
  • When the agent clicks on the 3 dot ellipses of the email body, then he is able to view the entire mail trail conversation 
  • When the agent clicks on the 3 dot ellipses of the email body, then he is able to view the entire mail trail conversation 
  • All email conversations within the one view are displayed as cards. Clicking on them opens the respective email.
  • Agents can add attachments to the email by clicking on the attachment icon in the respond box. 
  • Following are the supported/unsupported attachment types
  • File types allowed – .doc, .docx, .xls, .xlsx, .ppt, .pptx, .xps, .pdf, .ai, .psd, .dxf, .eps, .ps, .svg, .ttf, .zip, .rar, .tar, .gzip, .mp3, .mpeg, .wav, .ogg, .jpeg, .jpg, .png, .gif, .bmp, .tif, .webm, .mpeg4, .3gpp, .mov, .avi, .mpegps, .wmv, .flv, .txt, .csv, .tsv
  • File types not allowed as attachments – .ade, .adp, .apk, .appx, .appxbundle, .bat, .cab, .chm, .cmd, .com, .cpl, .dll, .dmg, .exe, .hta, .ins, .isp, .iso, .jar, .js, .jse, .lib, .lnk, .mde, .msc, .msi, .msix, .msixbundle, .msp, .mst, .nsh, .pif, .ps1, .scr, .sct, .shb, .sys, .vb, .vbe, .vbs, .vxd, .wsc, .wsf, .wsh
  • Max. attachment size – 25 MB and total attachment size – 25 MB
  • The user and agent can add an inline image, either by drag/drop or directly pasting it into the email body 

7. Canned Responses

Canned Email Responses will available in the Configure > Live Chat > Email Responses section.

Only an Owner or supervisor can add a canned email response. Supervisors can use system attributes or other flow attributes in a canned email response.

An agent has the option to insert a canned email response while responding to a user. When the canned response is inserted, any attributes used are resolved automatically.

  • When the canned email response is inserted, it will replace the existing text. The agent can then edit the text as required.
  • Agents will be able to create canned responses from the one view inbox. This is similar to quick replies.