Twitter is an American online news and social networking service where users post and interact with messages known as “tweets”. And if you looking to Deploy your bot on Twitter Elitbuzz helps you do that. Any users who want to send you a direct message on your Twitter account will be able to access the conversational flow that you have set up for your bot. The bot will also be able to answer any FAQs that it has been trained for.
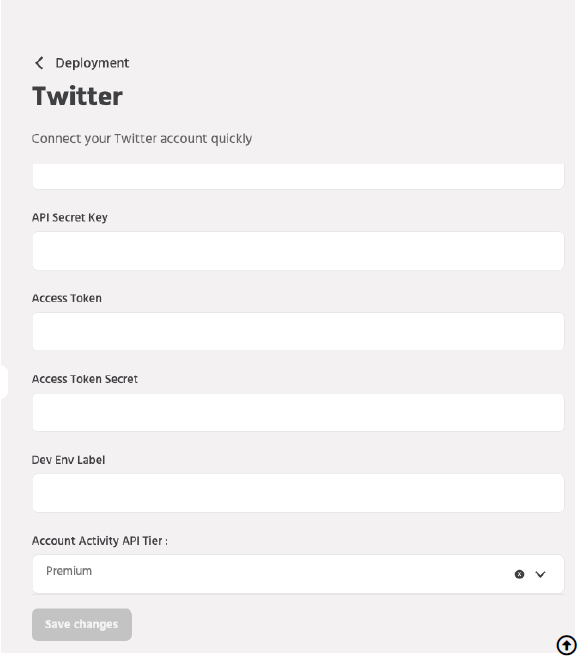
1. To access Twitter Setup, navigate to Configure> Deployments> Twitter.

To have your bot on your Twitter account you need to have a developers account with the same email id. You can go to https://apps.twitter.com/ and create a developer account. Twitter will verify the purpose of the account and how you will be using the developer’s API. This verification takes around 2-3 days and once you have the developers account created you can proceed with the setup.
Here’s how you deploy your chatbot on Twitter
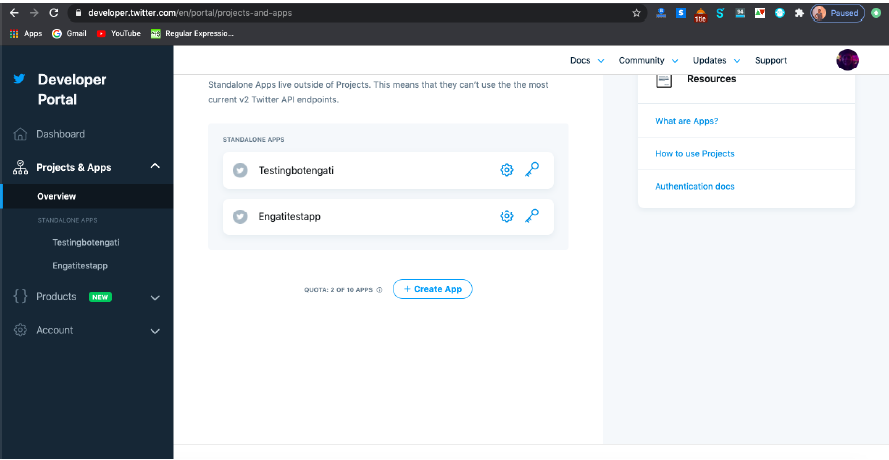
Log in to your Twitter developers account and create a Twitter application. Go to Project and Apps -> Overview. Here you’ll be able to see the list of projects and apps if created. Click on Create App below standalone apps.
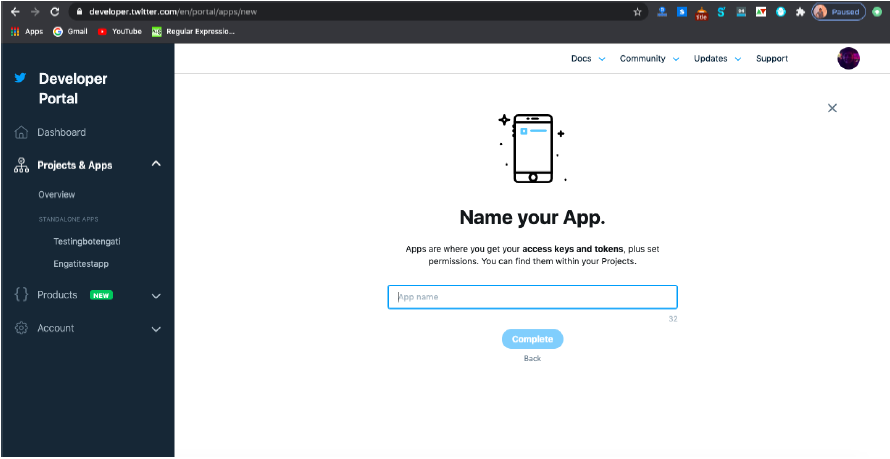
Setup the app name.
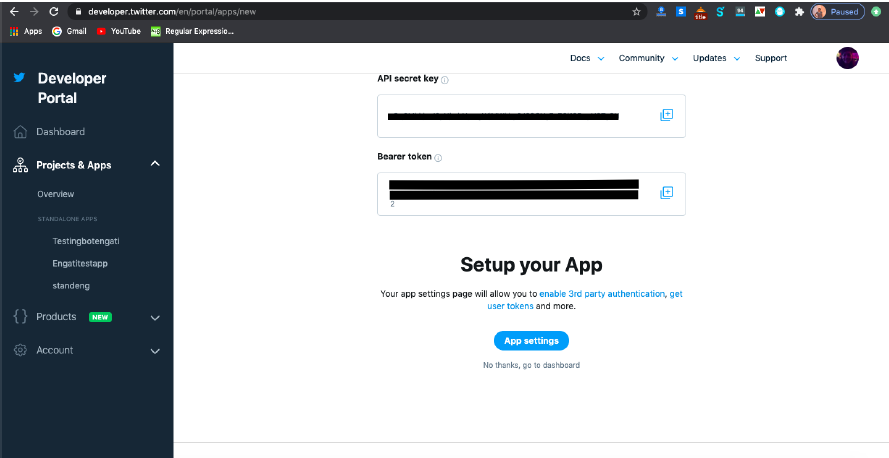
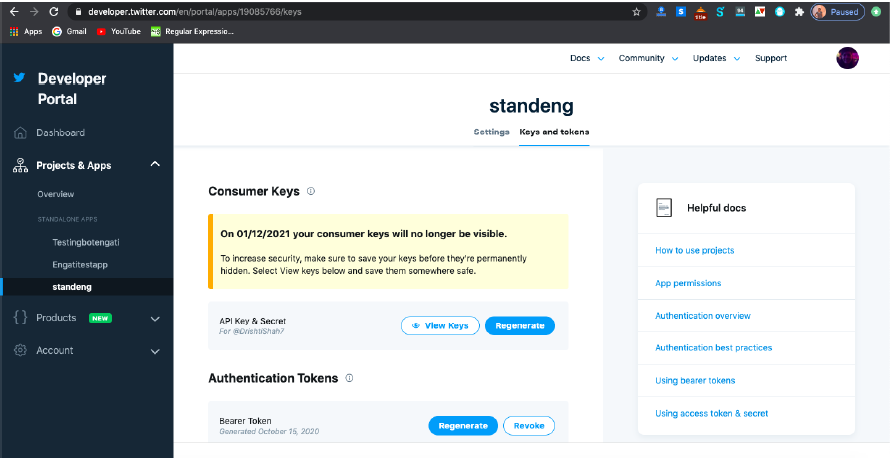
You can copy the API Key and API secret key. Click on App Settings
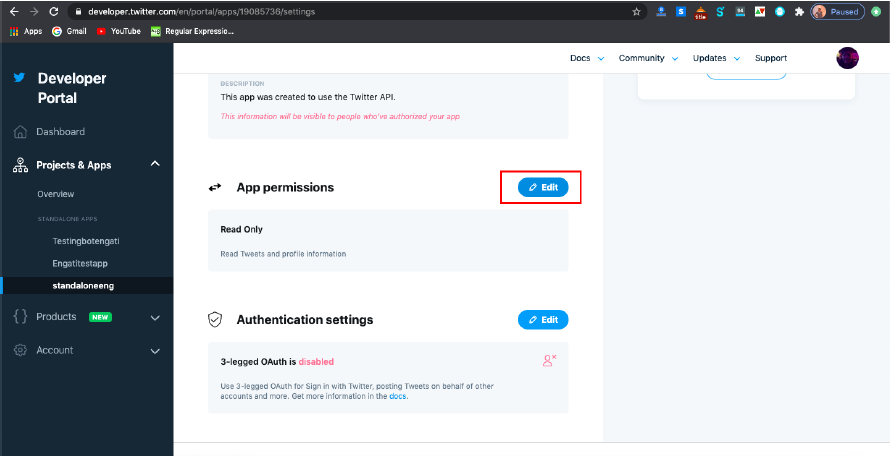
In the App Settings, click on “Edit” near App Permissions and select “Read, Write and Access direct messages” then click on “Save“. Access direct messages option needs to be selected for the chatbot to function along with Read and Write.

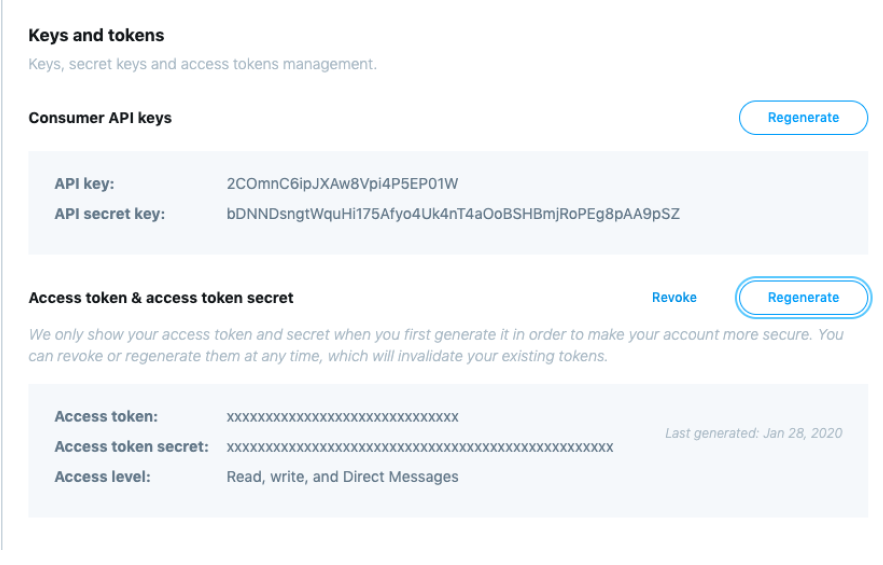
For the Twitter app, go to the Keys and tokens section and note down the API key, API secret key, Access token and Access token secret. These details would be needed to set up the chatbot on Elitbuzz, as per the last step of detail updating.
Follow this documentation to apply for relevant Account Activity API access. You may either apply for Premium or Enterprise access. The access type [Premium or Enterprise] needs to be set up on the Elitbuzz portal(Configure->Deployments->Twitter) correctly.
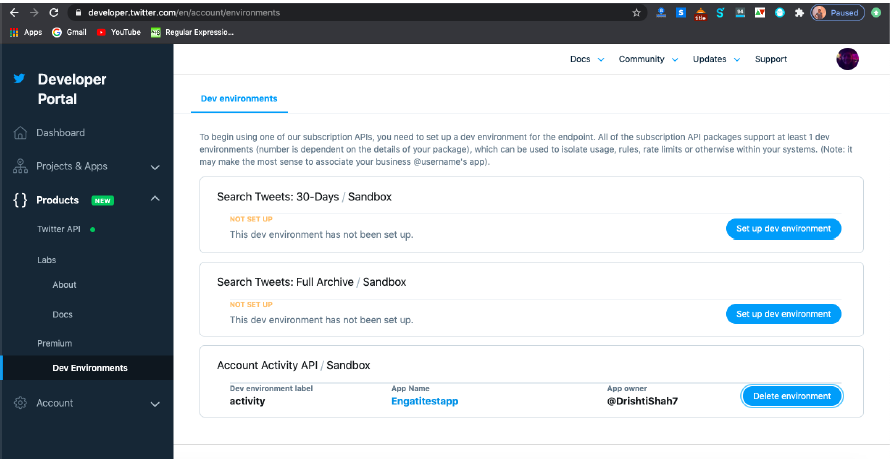
Go to the dev environments page. Click ‘Set up dev environment‘ for Account type – Account Activity API, name your environment, and specify a Twitter app ID to link with the environment. The environment name you chose will be your Dev environment label, which needs to be updated on the Elitbuzz portal as well.
For your account, go to the Security section and check the “Receive Direct Messages from anyone” from the bottom of the page and then save the changes.

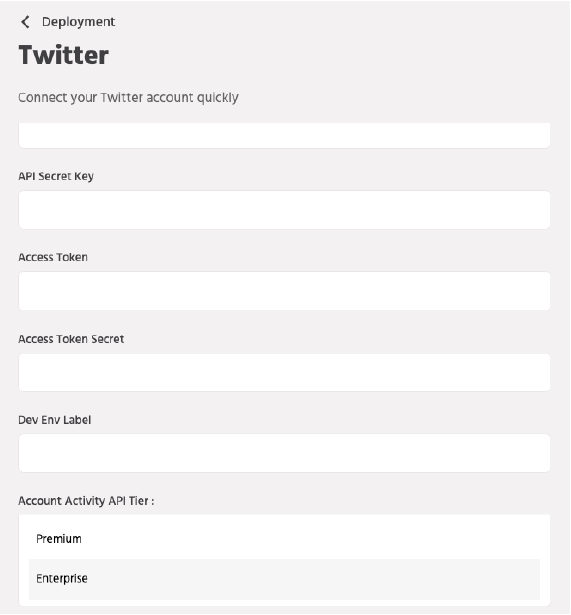
Update the following details in the Twitter configuration section under Deploy->Twitter and click on the save button your bot is ready to respond to all your direct messages on Twitter.
– Twitter Admin username(the name for your Twitter Handle)
– Consumer Key(from Step 3)
– Consumer Secret(from Step 3)
– Access Token(from Step 3)
– Access Token Secret(from Step 3)
– Dev Environment Label(from Step 5)
– The appropriate Twitter Account type, namely – Premium or Enterprise. (based on the account type)