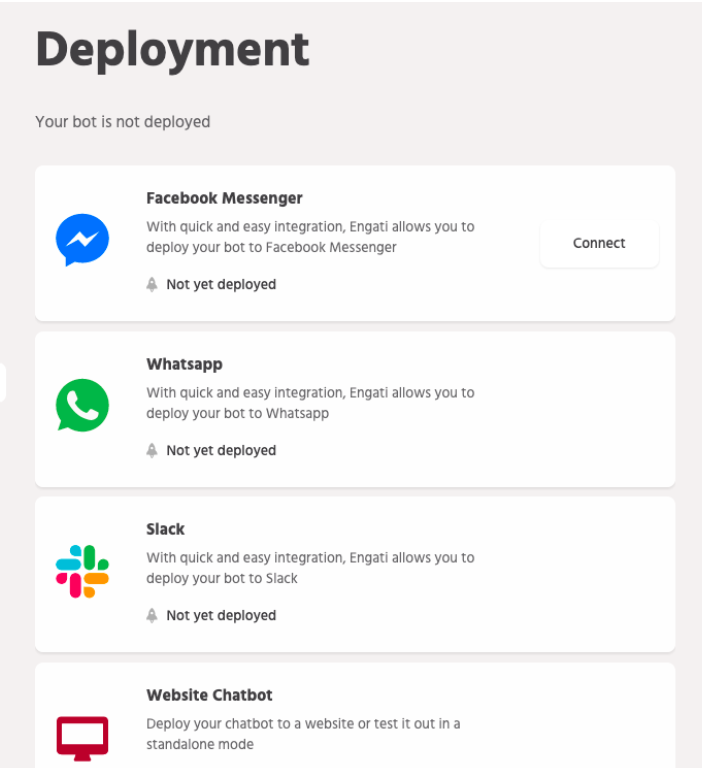
Facebook Messenger (or Messenger) is an instant messaging service and software application. Users can send messages and exchange photos, videos, stickers, audio, and files, as well as react to other users’ messages and interact with bots. Elitbuzz allows you to deploy your bot on messenger.
Access the Facebook channel via Configure> Deployments> Facebook
Let me explain to you how you can deploy your chatbot on a Facebook Page
1. In order for you to deploy the chatbot on Facebook you would require a page that you are administering, If you don’t have a page, create one before proceeding further.
2. Click on Sign-in and login via your credentials.
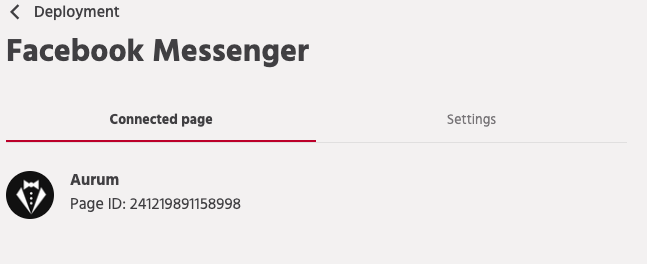
3. After logging in you will get a list of your Facebook pages for which you gave the permissions. Just select one of them and click on the Connect button to create your messenger bot.
4. You can always click on the ‘Try Chat’ button to see how your bot works on Facebook messenger

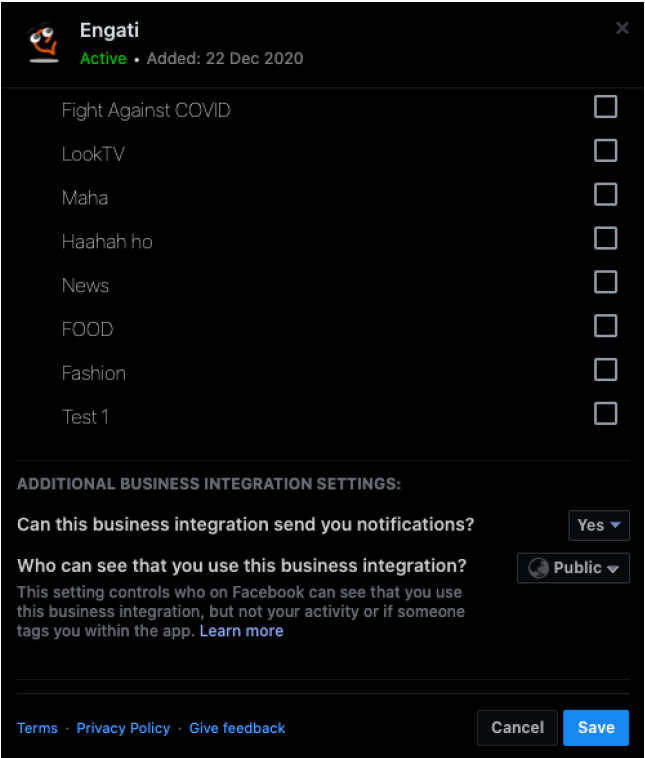
Notes to remember – 1. Make sure all pop-ups are unblocked. 2. Allow all the permissions that are being asked by Default, these permissions are required for the successful deployment of the chatbot. 3. Changing the password and the role of the person who has deployed the bot on the Facebook page will cause the token provided by Facebook to expire, for which you would need to re-authorize the token, please follow the steps below to do so. a) In a new incognito window log in to Elitbuzz Portal. b) Click on Logout and then on Sign-in. c) Log into your account and re-integrate. d) Once done click select the Page and click on Connect. 4. If a particular page is not visible then you would need to allow the permissions for them via the Business Integrations of your Facebook page.

a) Click on the View and Edit beside the Elitbuzz Logo present in the Active tab.

b) Enable the permissions for your other pages too –
1. Manage your pages. 2. Manage and access your page conversations on messenger. 3. Show a list of the pages you manage.

c) Once these have been checked & marked for the new page kindly Save the options and the changes should then reflect on the bot platform too.
Once you link your Facebook page to your bot you can go to the Settings tab and select User Comments.
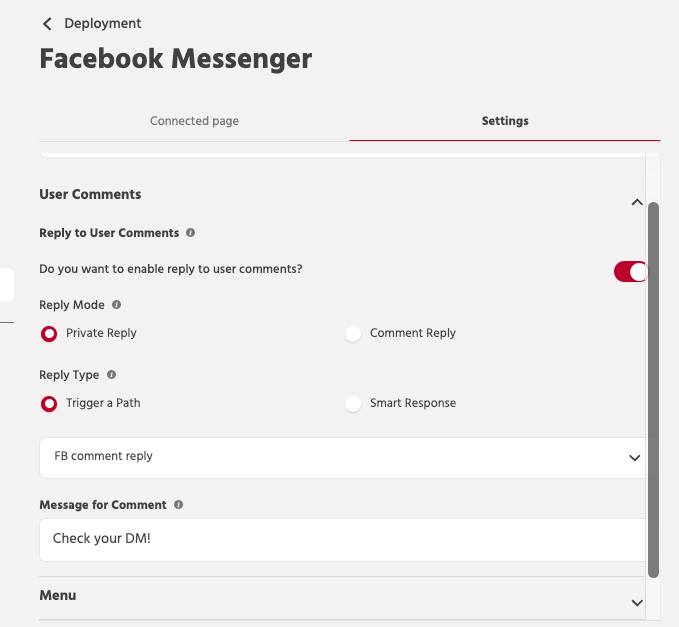
You can enable the toggle for user comments. The reply mode has two options, you can either reply to the comment on the thread itself with ‘Comment Reply’ or you can start a new conversation on Facebook Messenger using ‘Private Reply’.
The reply type can be ‘Trigger a Path’ – this Path will be triggered for every comment on the FB post.
For the ‘Smart Response’ reply type – An FAQ will be triggered for the comment if there’s a match. In case of no match, the bot will trigger the Default response
One amazing feature that Elitbuzz provides you is Adding a quick access menu on your messenger bot, where the users can have quick access to the different paths of your bot, A URL link, or a submenu to your menu.
There are only two main steps to adding a menu on messenger
Once you link your Facebook page to your bot you can go to the Settings tab and select Menu
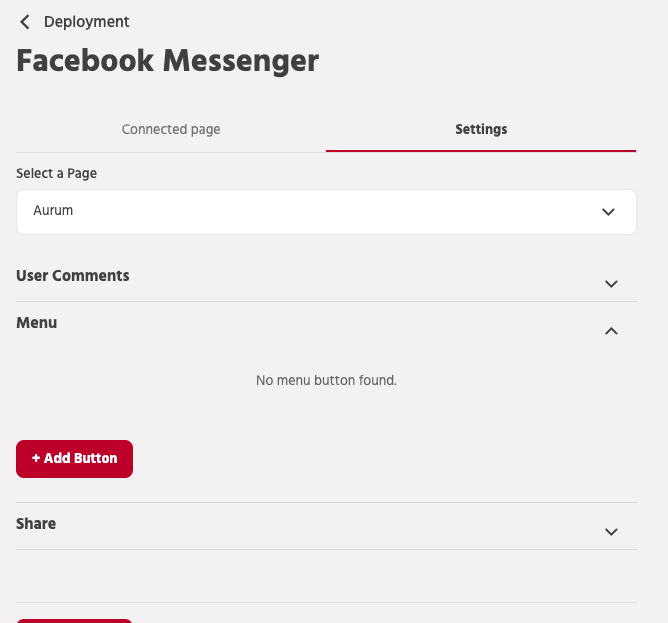
Click on the +Add button under the menu
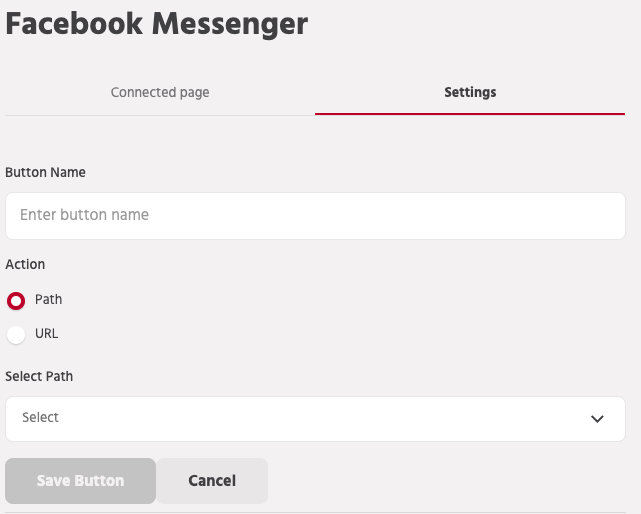
Button name refers to the button name that you will see in the menu which you can set of your choice.
[Note: You have to have a name for your button to save your menu ]
You can choose any path you wish to connect to a particular button on the menu. From the actions select Path and from the Dropdown menu select a path you want to link to that button.
If you wish to redirect to a URL if the user clicks on a particular button of the menu you can do that using this; Just paste your URL into the URL tab and give that button a name click on save and you are done.
[Note: It has to have a valid URL to save it as a button]
This allows you to create a submenu for your button in the menu which again you will have to configure and set to redirect to a path or a URL.
[Note: All the buttons in the menu have to be redirected to a valid path or a valid URL for it to be shown on the messenger.]
Once you are done configuring your menu all you have to do is to save it by clicking on the Save Menu button.
1.Navigate to ‘Page Settings’ from manage pages

2.Select ‘Advanced Messaging’ and the field with the heading Whitelabel domains
3.Input https://app.elitbuzz.com in the field available and click on ‘Save’

4.Select ‘Advanced Messaging’ and the field with the heading Whitelabel domains
Input https://app.elitbuzz.com in the field available and click on ‘Save’
1.Open Facebook ads Manager,
2.Create a Campaign and ad set.
3.Select Messenger, and carousel as formats for ad setup
4.Scroll below to the message template section and select Advanced Setup
5.Use the flow key of the path from the Elitbuzz chatbot that you would like to have triggered when a user clicks on your ad.
If you want to unsubscribe from a Facebook page without deleting the bot you can do the same by following the below steps.
Step 1: Log in to the Elitbuzz portal.
Step 2: Go to the Facebook messenger tab in the deploy tab.
Step 3: Click on the Disable button to disable the bot from the page it was deployed on once done you can log out of the Facebook messenger.

Note: The bot is automatically unsubscribed from your Facebook page if it is deleted. In case of any issues, feel free to reach out to [email protected]